Convertible rocker
Project Context
This is still one of my favorite team projects that I've ever been a part of. Just like Blending Blocks, this concept was designed in a collaborative effort for PlanToys. The Convertible Rocker was our second-most refined and well received toy concept that we got to work on. I immediately fell in love with the idea of the Convertible Rocker. It presented a fulfilling and unique challenge that amplified my passion for Product Design. Selfishly, I really enjoy designing concepts that focus on form development. Not to mention, I have a deep appreciation for toys with material and technical simplicity, because they often stand the test of time. Their play-value isn't constrained by battery-life or motor performance. The success of the Convertible Rocker's usability purely relied on our advancements with its form development, for better or worse. Within 8 weeks, this concept went from a doodle on a flashcard to a high-fidelity prototype…

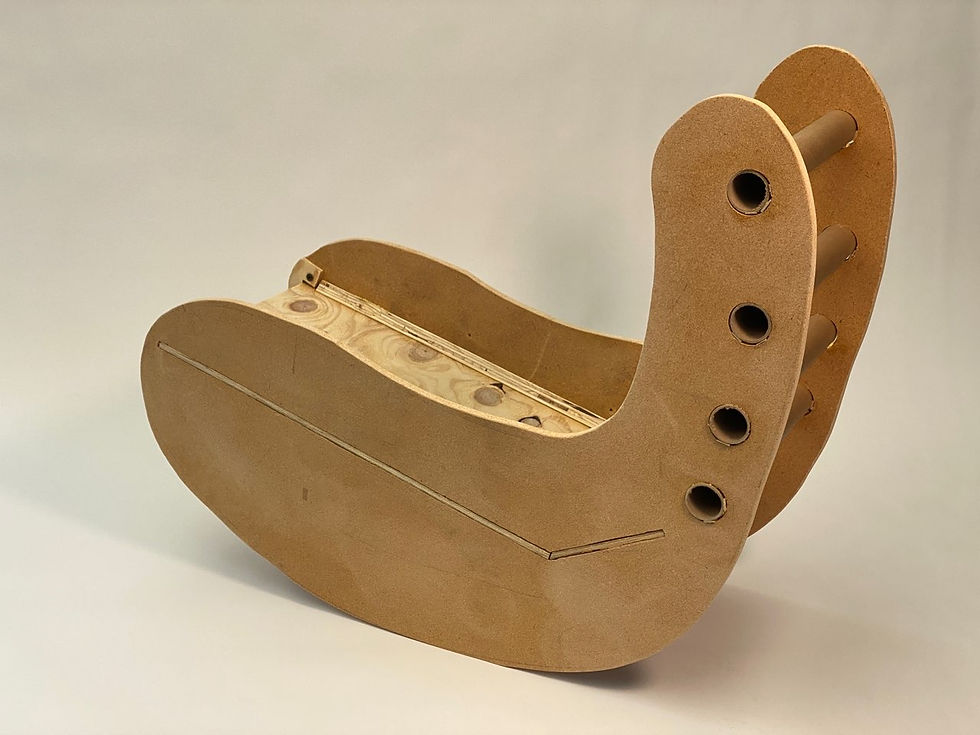
Phase 1: Sketch Model
Our low-fidelity attempt
Building the sketch model involved using scrap particle board in our university's woodshop and tracing out a rough measurement of the toy's side profile to cut out. We used a piece of scrap plywood for the slide/seat portion, and then a cardboard tube for the climbing step/backrest portion.
The first attempt was a great learning experience for us. When we used it for the first time, we were tangibly confronted with the fact that the concept is not just a toy: it is also a piece of furniture. Making that consideration was crucial in designing the toy's ergonomic details.
Our goals for the next phase were to upgrade the material and improve symmetry, balance, and structural integrity. We drafted a plan and landed on more precise measurements for the next iteration.

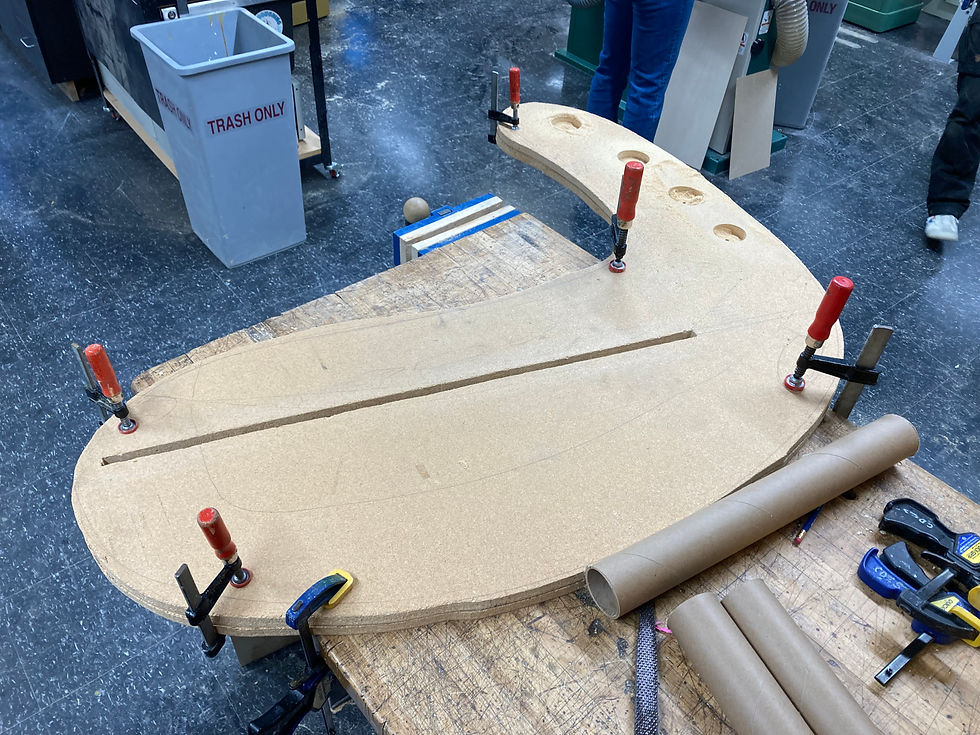

Phase 2: Prototype 1.5
Upgrading fabrication methods
We decided that CNC routing was our easiest bet for fabricating an evenly proportioned first prototype to show our client. Adobe Illustrator was my digital medium of choice for designing the rocker's silhouette/profile.
We used birch plywood and wood glue for assembly.
The material and fabrication improvements made a monumental difference in the quality.


Phase 3: User Testing
Listening and observing users
For prototype 1.5 user testing, we had a 2-year-old and a 6-year-old play with the Rocker and two parents watch/assist the children when needed. We used our observations of each user, as well as their comments, to determine what needed to be altered. Their feedback gave us very helpful insight on the two user groups: the parent (i.e. the buyer/assembler) and the child (i.e. the end user).
Prototype 1.5 was a great improvement from our sketch model. But it still had issues with weight distribution, chair ergonomics, and overall size. The length of the Rocker's seat was too long for the kids, and the climbing element lacked challenge.
We made a list of every aspect that we needed to focus on in developing the final iteration. This included things from user testing, concerns regarding assembly, manufacturing, packaging, shipping, pricing, and any guidance from our mentors.


Phase 4: Iteration
Mid-fidelity prototypes
Between material cost and a 6+ hour CNC runtime, fabrication for prototype 1.5 was pretty expensive. But we still had iterations to explore, and a final prototype to build. So, I used a laser cutter to make 1:16 scale miniature prototypes before going forward with our next full-sized prototype. This was an excellent decision, as it simplified the iterative process.
The most challenging aspect of this project was figuring out how to make two objects with different applications work successfully as one product in a cohesive way without compromising the integrity of either use. Working within the confines of both functions gave us a plethora of considerations to make. We essentially had to implement the ergonomics of a chair with a rocking motion and the traversable condition of a children's slide.


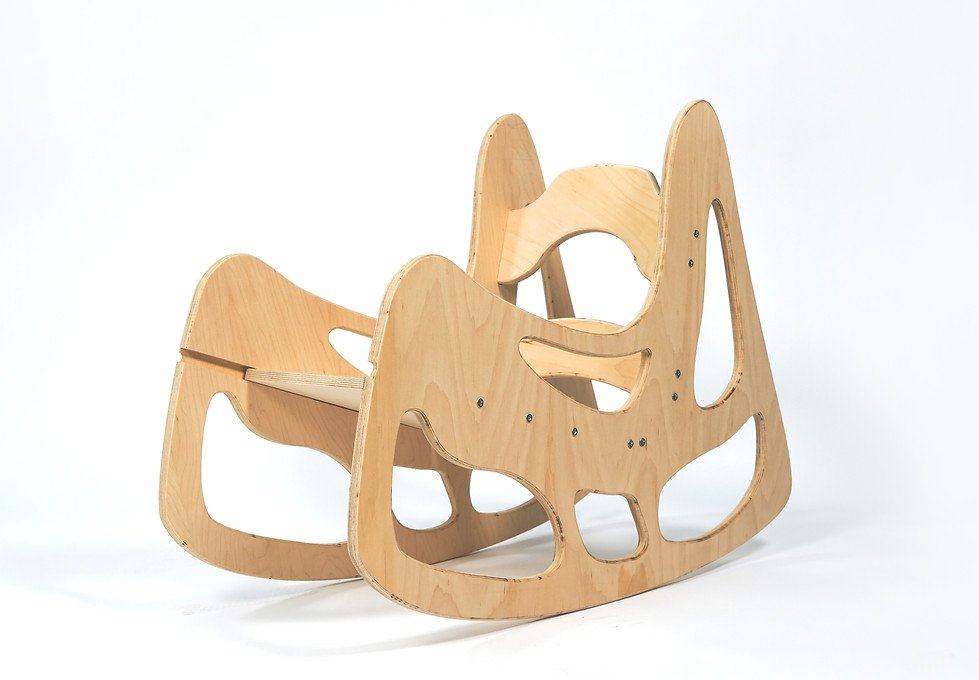
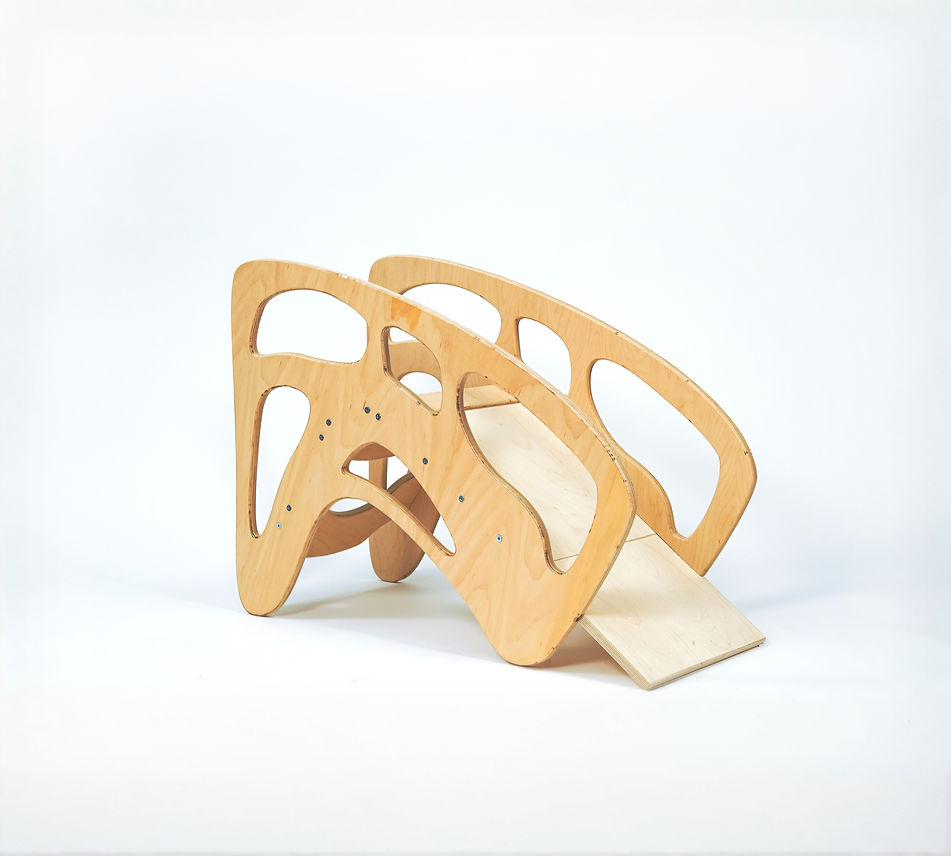
Phase 5: Prototype 2
The outcome of our final attempt
For our last iteration, we used threaded inserts and bolts instead of wood glue to make assembly easier. I also designed the profile to have more cutouts to reduce weight. Additionally, I gave the seat portion a shorter length, and added a piece that served as a slide extension.
We had to cut out all of the Rocker's pieces on a 4'x4' piece of 3/4" maple plywood, so I set up the vector pathways in a way that left the least amount of material waste.